Having recently put in a new kitchen, it was immediately apparent to my wife that the wooden stools that we owned were not in ANY WAY suitable. For anything. Not even worth turning into kindling.
…
So we decided to buy some new stools/chairs. They had to have backs on them, rather than just being stools, so that we could sit comfortably in them for an extended period of time. They also had to be at the correct height for the new kitchen island (900mm high, 40mm thick benchtop), which (I discovered after experimenting with the wooden stools and a hacksaw) is exactly 650mm. Now here’s what I have since learned about chairs and stools:
- They’re too damn expensive. Even the replicas. And expecially the “fancy” replicas (yeah. apparently that’s a thing too).
- Most of them are far to unstable to be so expensive.
- Most of them are far too uncomfortable to be so unstable.
- They are all the wrong height
Despite these difficulties, we found some chairs that were comfortable, stable, and not QUITE expensive enough to make me cry a little bit when no-one else was around. but of course, they were the wrong height. It was a 70cm (-ish) Bertoia chrome “replica” chair. I say it was a replica chair, but… it still behaved like a chair when I sat on it, so I’m not exactly sure what that’s all about…
I decided that the best option was to get the right chair, and then just fix their design flaw, but cutting 55mm off the height of the chair. We bought one chair to make sure I could do this without completely wrecking the chair, and once I proved that it was fine, we bought another three.
Since I didn’t want to waste that much money, I did the following:
- Took some careful measurements of the height to the top of the cushion where the thigh rests, and the angle of the chair legs.
- Took the measurements again.
- Designed a mitre block to act as a guide while cutting.
- Printed the mitre block on my 3D printer
- Cut the legs to the correct length.
- Re-capped the legs.
- Designed and printed a replacement cap for one leg that came with a broken cap.
- Sat and went “Ahhh”.
The mitre block only needed to cut perpendicularly, since the caps only fit square to the leg. I made two blocks: one for the front legs, one for the rear legs. Realistically, I didn’t need to. The front legs, being at 81.5° to the ground, needed 55.6mm cut off. The rear legs, being at 76.5° to the ground, needed 56.6mm cut off. But, I made two different mitre blocks anyway, just for the hell of it. I made sure the hole through the blocks fit easily, but not loosely, around the leg of the chairs, and provided an open section to allow the block to be clamped to the leg of the chair. To see what the block looked like, check out the Thingiverse files.
http://www.thingiverse.com/thing:347759
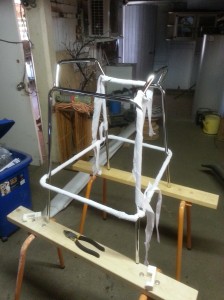
Here are some photos of the chairs, and the process:
And some photos of the end cap replacement:


